Hi folks! Like everyone else in possession of a sewing machine and any amount of free time at all, I’ve been sewing masks! I’ve been using the NYT pattern — not because I necessarily think it’s the best, but because it was Good Enough, and I found myself falling way way way down an internet hole of different patterns, techniques, etc. …. which was not getting any masks sewn!
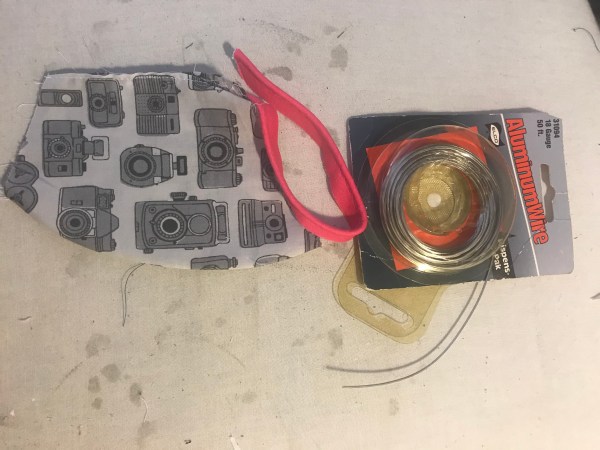
I’m very lucky in that I have tons of leftover/scrap high-quality cotton fabric, and literally MORE BIAS TAPE than I knew what to do with. I also have (as regular readers know), vast quantities of piping, and much love for same.
I also wear glasses, and was interested in maybe having a mask with a nose wire so that I could fit it tightly and limit the amount of glasses-fogging that could occur. Plus (and this is the important part) I had some leftover wire from a project that I don’t even remember doing. The only problem was, the wire was thin and sharp … hmm … what to do … piping!
By adding wire to piping and piping the top line of the mask, I could have a tighter-fitting mask, not poke myself in the eye, and also have piping! Win-win!
Here’s how to do it:
- Cut out your mask pieces (fabric and lining) and sew the center seam of your mask as directed.
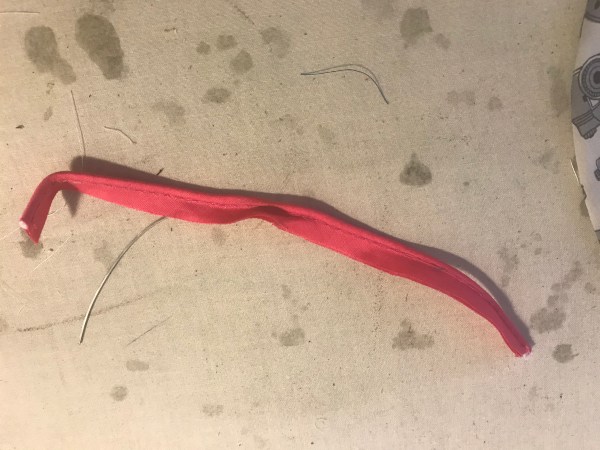
- Cut a piece of piping long enough to go the whole top edge of the mask:

- Cut a piece of wire (with paper scissors, not fabric scissors!) about 3/4 to 5/8 as long as the piece of piping (I just eyeball it):
- Insert the wire INTO the piping. Just poke that sucker in between two stitches!
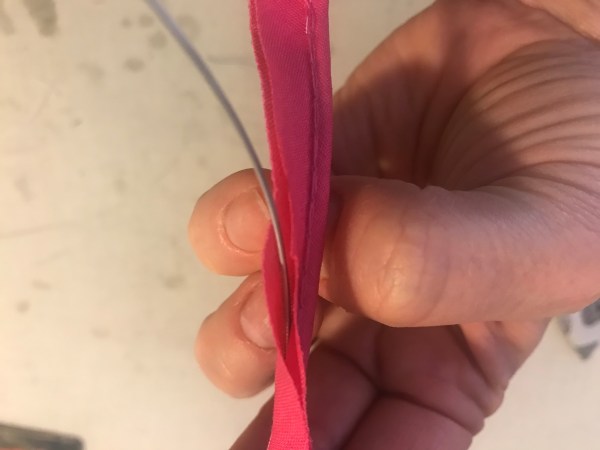
Skoosh it through the piping, like you were putting elastic or a drawstring cord through a casing. It should go through reasonably well, although you might have trouble if there’s a seam in your piece of piping. Take care not to shove it so hard that it bunches up the piping cord or goes through the piping fabric. (This is easier than it sounds, I promise!)
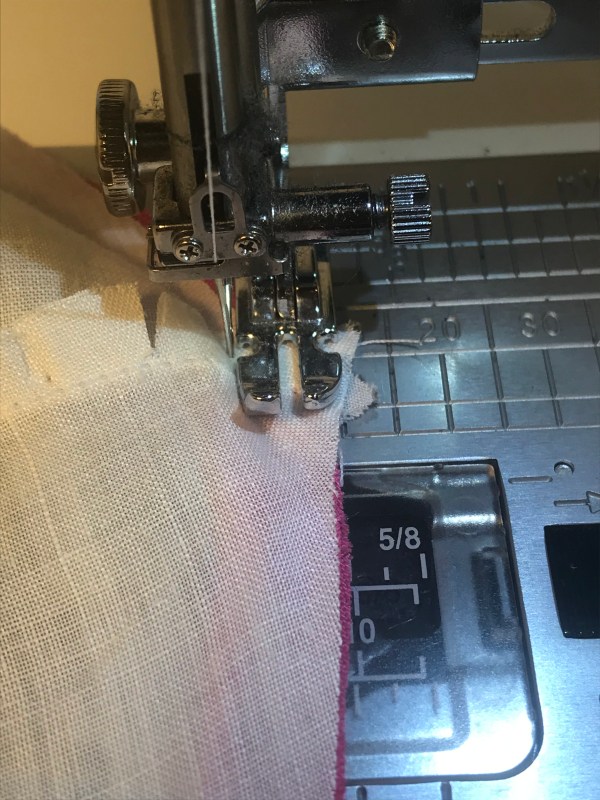
- Make a sandwich of the piping, lining fabric, and outer fabric:
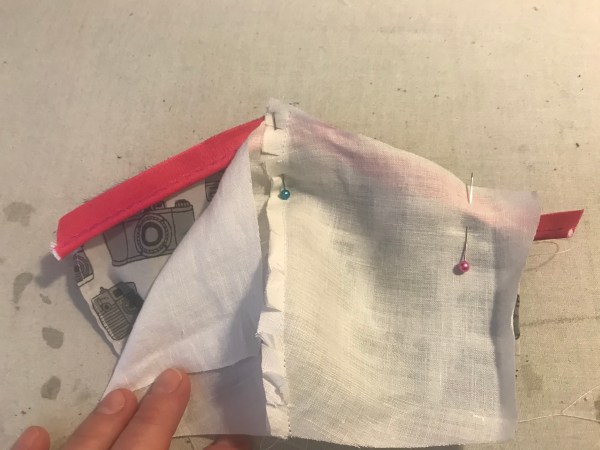
Note that the piping edge is going DOWN into the mask!(I had yards of this fine white cotton fabric and wasn’t sure where it had come from, and after cutting quite a lot of it for mask linings I realized that it was leftover from the surplices my husband’s grandmother used to sew for her local priest …)
- Sew the piping sandwich. I use a narrow foot. If your lining fabric is thinner, put that side up. Basically you want to be able to feel or see the edge of the piping, so that you don’t sew over it.
IMPORTANT: there is a slight chance you could break a needle if you accidentally hit the wire (I haven’t yet) so do wear some eye protection!

Pivot the needle at the center seam:
- Turn and press:

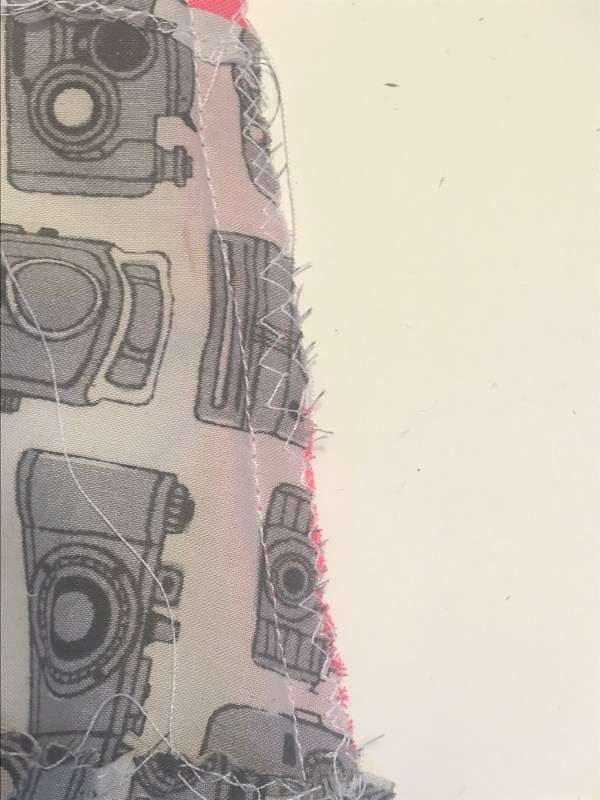
- If your fabric is likely to fray, you can finish the edge with a narrow zigzag. If you’re feeling super-ambitious you can also edge-stitch the lining, but I haven’t.
- Finish as you otherwise would!
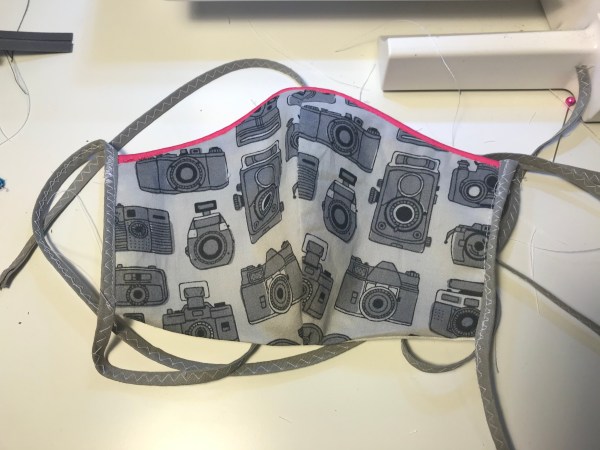
I hope you find this helpful! Stay well!

Ooh, lovely idea. I’d skipped the nose wire on my first masks, found that was a bad idea since it meant my glasses were fogging up, and added wire with a bit of ribbon to cover it after the fact. It digs into my nose now, so obviously I need to tinker with the concept.
LikeLike
Thanks, Erin. I’ve been using plastic coated twist ties, doubled up and am running out of supplies; wire manufacturing seems to be all but shutdown but I have lots on hand. This will work for me!
LikeLike
Hello, Thank you for the advice and the very clear demonstration. I also use iron-on interfacing on the outer layer of the mask because it is non-woven and it provides another layer of protection.
LikeLike
Try dhuratadavies.com for a really cool mask pattern. I too had given up on multiple patterns , this one has nose and chin darts and works a dream. Is also very easy. Very sewist friendly – I mean we all get how to do darts !!
I love your piping for nose wire suggestion – the most obvious and simple solution yet. Off to order piping , and to filch wire from the man cave.
LikeLike